Start: replace or new install?
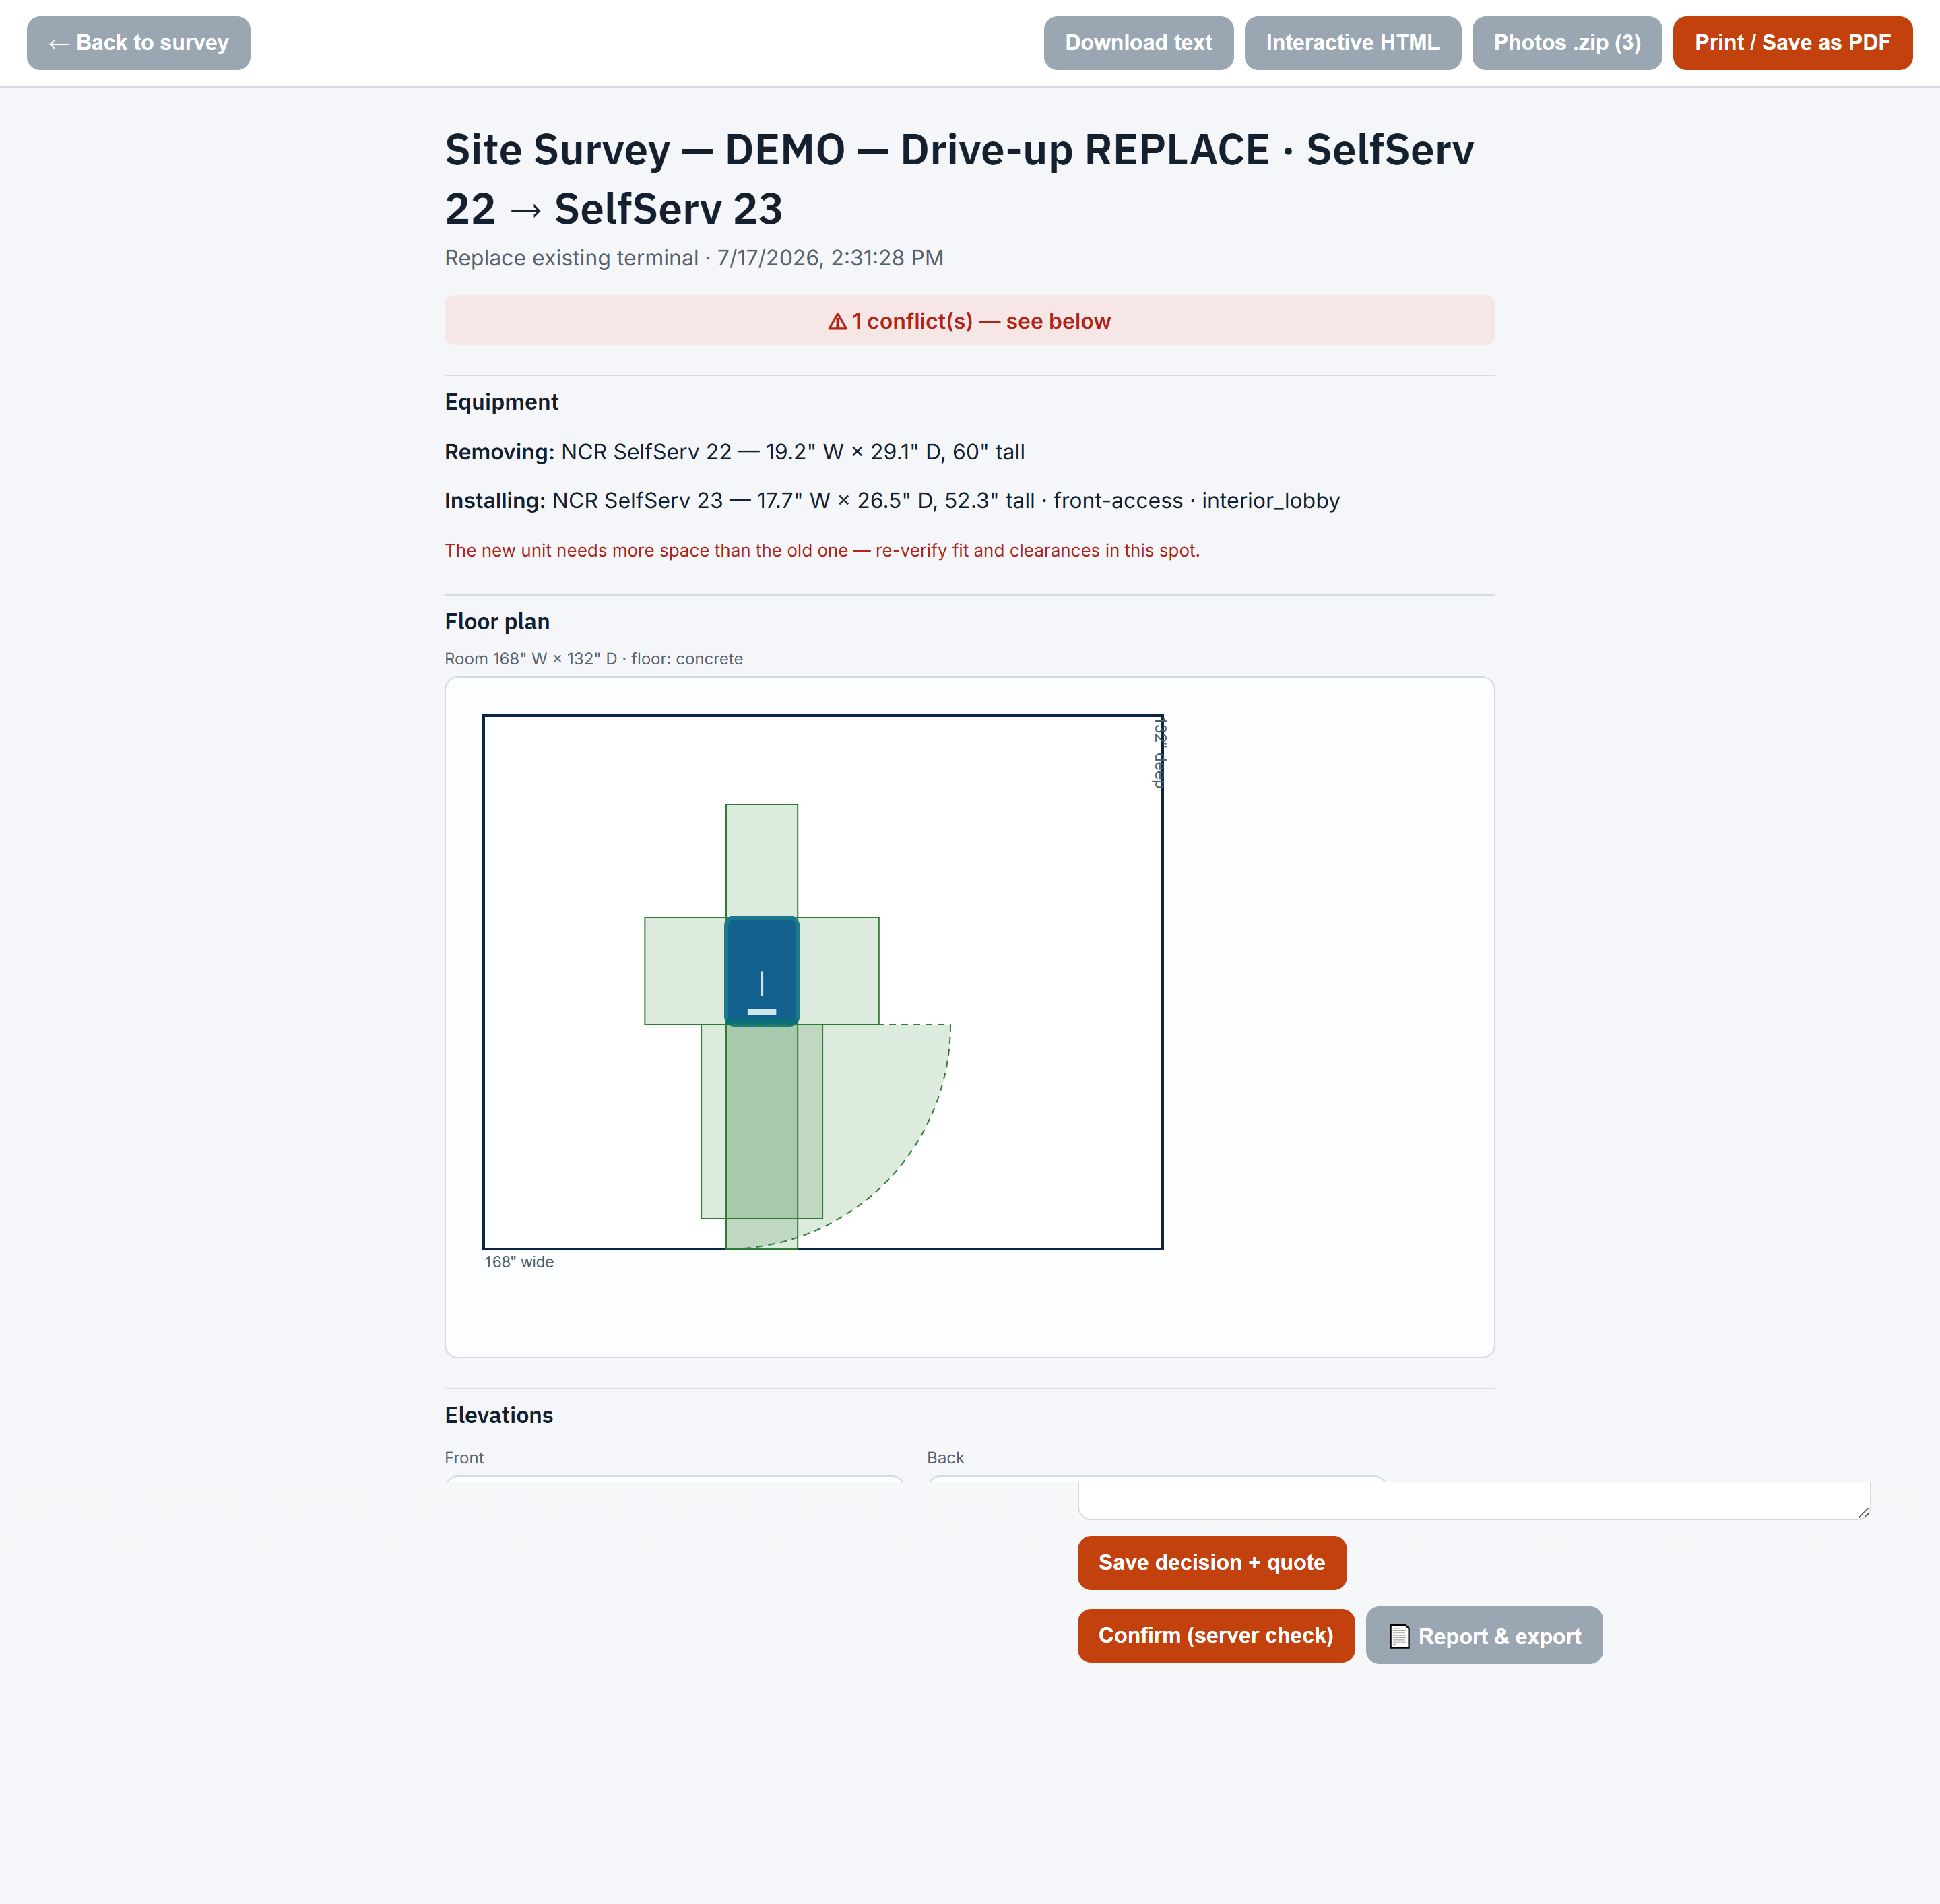
Every survey opens with one question. On a replacement, PrepPoint captures the existing terminal first, so it can compare the new unit against what's already there. On a new install, you go straight to building the room.
Build the room.
Lay out the space the equipment goes into — walls, doorways, the vault, and any obstacles, each with its dimensions and offsets. This is the canvas every clearance check runs against.
Place the unit — and watch it fit.
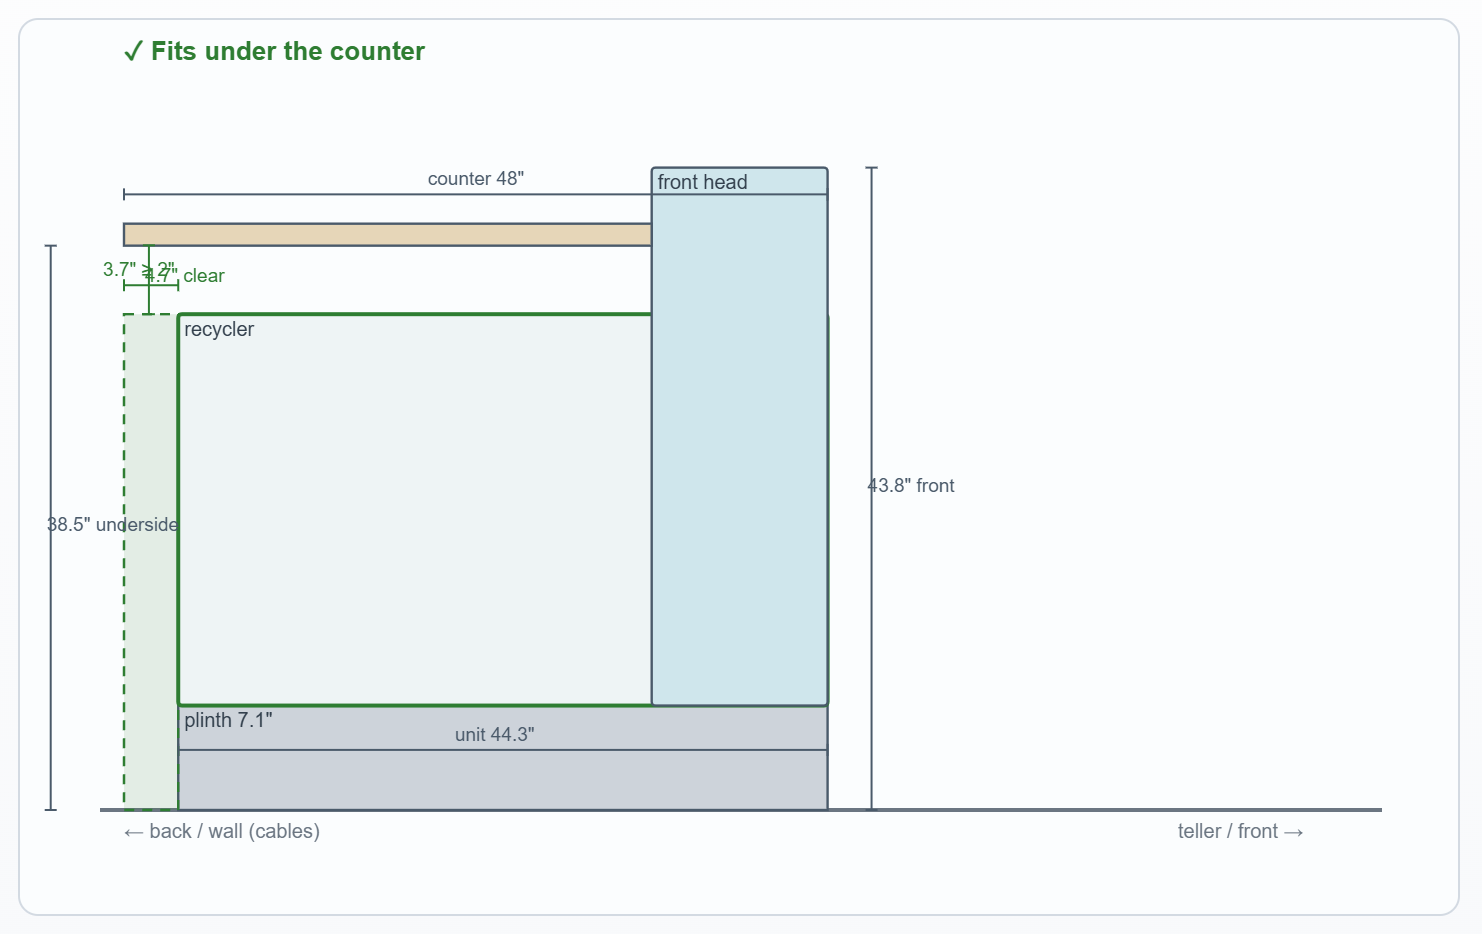
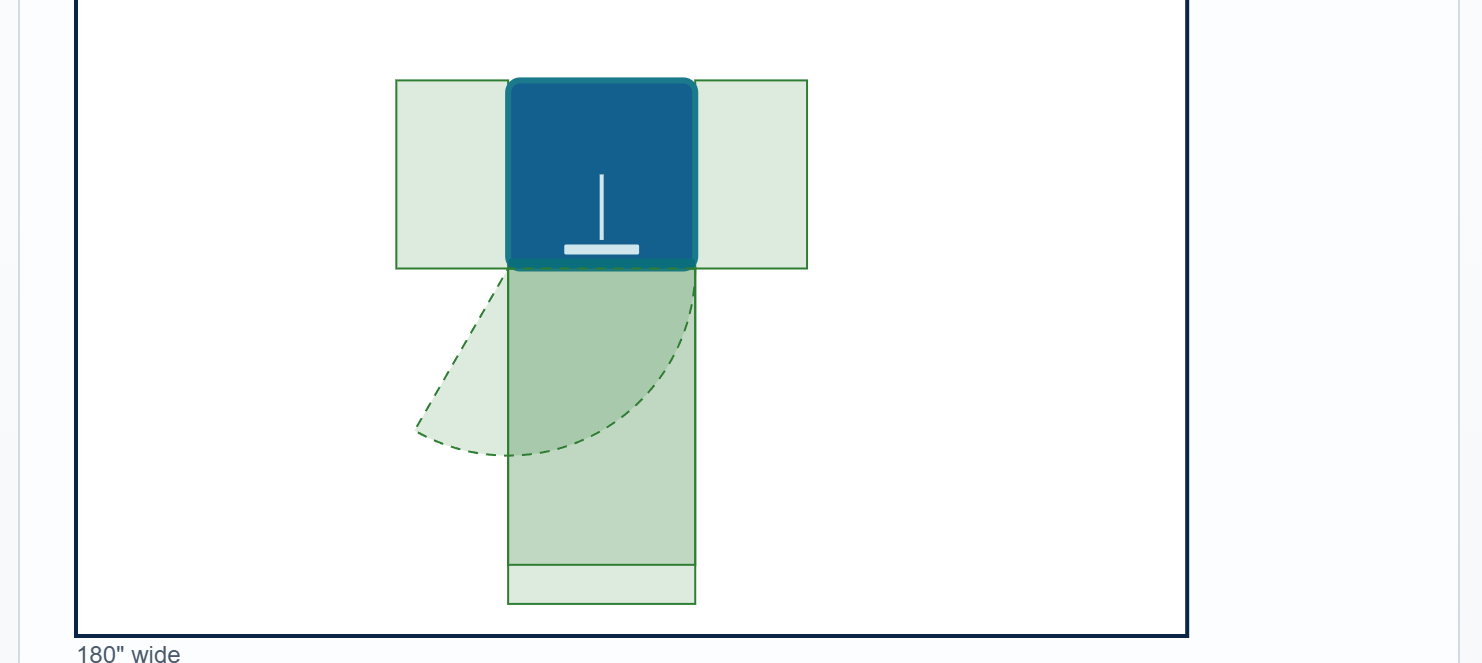
Drop in the exact equipment model and PrepPoint overlays its required clearances live, across three views: overhead for the footprint and service zones, front for the facia and (on customer-facing ATMs/ITMs) ADA reach, and back for rear access, power and data.
Check the access path.
It's not enough for the machine to fit the spot — it has to get there. PrepPoint walks the path from the exterior door to the final position and checks each doorway, corner, and turn against the unit's move-in dimensions.
Document it with photos.
Drop photo markers around the room and along the path — each one a directional cone showing where the rep stood and which way they shot. Guided prompts make sure the views that matter actually get captured.
Review, compare, sign off.
Back at the office, your specialist sees the whole survey — all three views, every conflict, and on a replacement, the new-vs-old comparison. They approve it, or send back a guided re-shoot. Out comes a structured package and quote you can order against.